Creating a 3 Page SuperReport Job Ticket (For Macintosh Computers)
By Jesse Wiegand 01/23/03
This tutorial is an example of how to setup a 3-page custom SuperReport. You could use this same tutorial to setup any custom SuperReport just by changing your page dimensions.
In order to setup a multi-page SuperReport, you will need to have a printer installed on your computer that is capable of printing on an oversized sheet. No, this doesn’t mean you have to go out and buy an expensive printer. It means you have to have the print driver for a large format printer. For this example we will be using the “DEC18_Trap_WF”. (Get the driver by clicking on this link: Dec18_Trap_WF_PPD.sit)
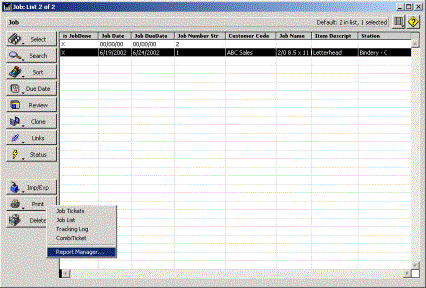
- From the job window highlight any job from the list then click on the <Print> button and select <Report Manager> from the dropdown menu.
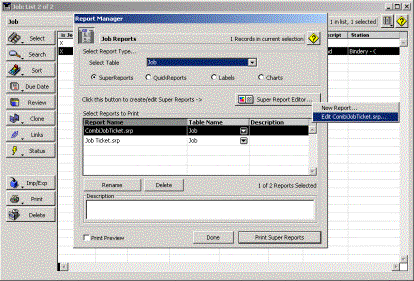
- From the “Reports Manager” window make sure that “Super Reports” is selected in the “Select Report Type” section. Then click the <Super Report Editor> button and select <New Report> from the drop down menu.
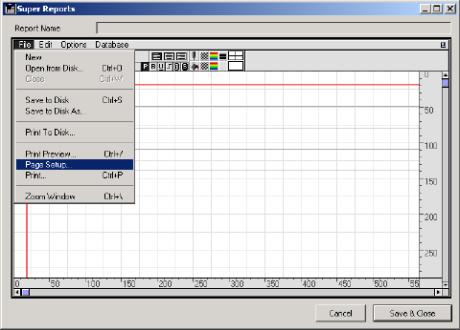
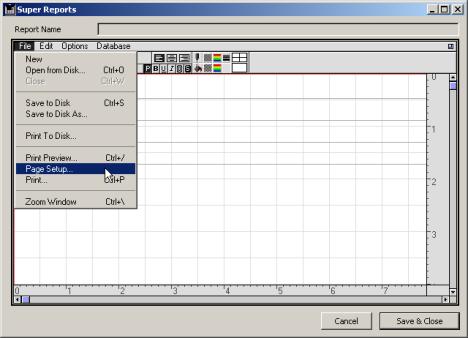
- Now you will be in the “Super Report Editor” window. By default, the page size is set for 8.5 X 11. Since, in this operation we want to setup a multi-page job ticket, we need to set the printer for this job ticket to be the one we just installed. So, our next step is to click on the <File> menu and select <Page Setup>.
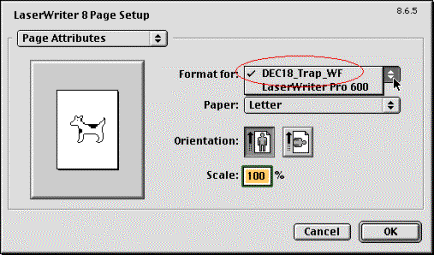
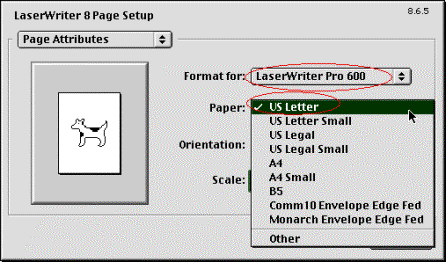
- This will open the “Print Setup” window. In the “Printer” section of that window select an oversize printer from the drop down menu.
- After selecting the printer change the Paper Size to “Custom Page Size 1.
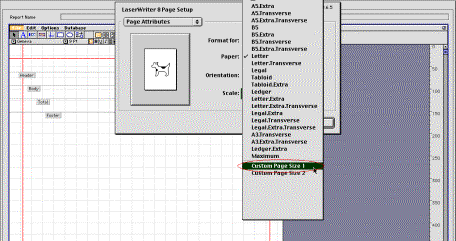
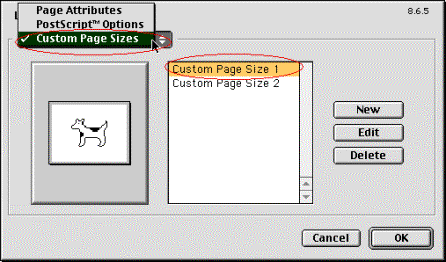
- Change the “Page Attributes” to “Custom Page Size”. Then double click on “Custom Page Size 1”.
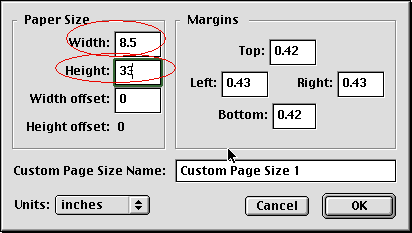
- From the “Customize Page Size 1” window change “Width” and “Height” from the “Page Size” area then click <OK>.
Note:
A page size of 8.5 X 33 will produce a three page 8.5 X 11.
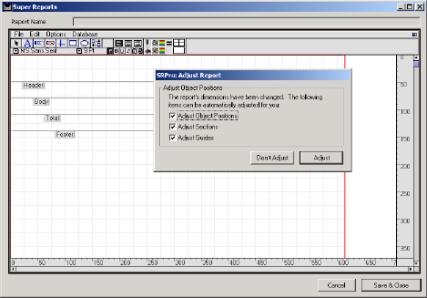
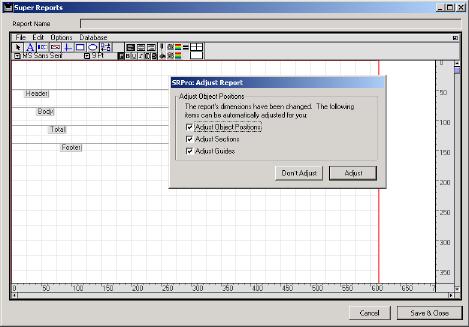
- Click the <OK> button on all windows until you see the “SRPro Adjust Reports” window. Click the <Don’t Adjust> button.
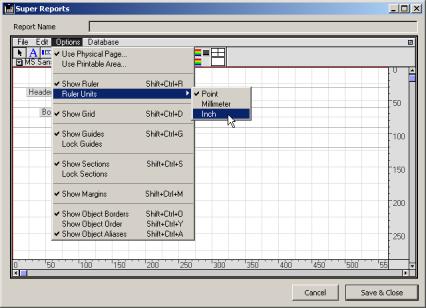
- The Super Report is set to view in Points. To change this to inches or millimeters click on the “Ruler Units” under the “Options” drop down menu.
- From here, you will be able to view the entire page size of the document. Once you finish editing the SuperReport, change the page setup back to your regular default printer. You will only use the above instruction to edit or create a multi-page SuperReport.
- Once you have edited the page, you will need to change the printer back to your normal default printer. In this example we are going to use the “LaserWriter Pro 600”.
- From the “File” menu select “Page Setup”
- From the “Page Setup” window select your normal default and change the paper to “US Letter”.
- From the “SRPro Adjust Report” window click <Don’t Adjust>. Then click <Save & Close>
Even though the SuperReport was setup as an 8.5 X 33 custom form, it will now print as 3 - 8.5 X 11 forms.
Whenever you want to edit the custom SuperReport you will need to change your printer to the oversized printer in order to view the entire SuperReport. Then, when your finished editing the report, change the printer back to your default printer so that the report will print on an 8.5 X 11 sheet of paper.