Customizing the Timeout Values (Macintosh Client)
By Jesse Wiegand 11/27/02
Note: Please consult a PrintPoint representative before performing any of the steps in this tutorial.
The following steps are to be done at all of your Macintosh Client machines.
Note: Where to find Customizer?
If you are running the server
application on a Macintosh Server, you will need to copy the “Customizer
Plus 6.5.4” application from your Server to the desktop of your Client. You
will find the application in the PrintPoint 4.5 Folder ® Additional Tools Folder.
If you are running the server
application on a PC Server, you can obtain the “Customizer Plus 6.5.4”
at the following link:
ftp://ftp.4d.com/PRODUCTS/4D/Current/4D_6.5.x/MacOS/4D_Customizer_Plus.hqx
- Make sure the “PrintPoint Client” application is NOT running.
- From your desktop double click on the <Customizer Plus 6.5.4> icon.

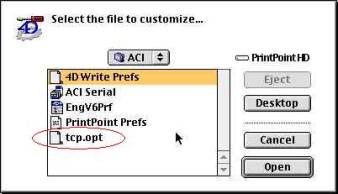
- Once Customizer is open, from the “File” menu select “Open”. From the “Select the file to customize…” window go to the ACI folder and select the “tcp.opt” file. The ACI folder is located in your System Folder ® Preference Folder.
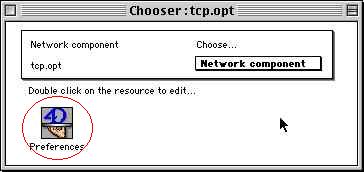
- From the “Chooser:tcp.opt” window double click on <Preferences>.
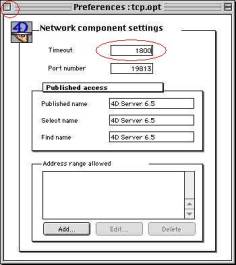
- In the “Preferences:tcp.opt” window change the “Timeout” to 1800. Then close the window.
- From the “File” menu select “Quit”. When prompted,click on <Save>.

After these changes and the changes to the server have been made you will be ready to start the client and run PrintPoint.