Changing the Customer Association
By Jesse Wiegand 04/15/2003
Sometimes it’s necessary to change the name of a customer. This can create problems when you need to search for records for that customer. The Estimates, Job Tickets, Shipping History and Invoices will still be associated with the old customer name. PrintPoint has incorporated tools into the program that will make it easy to modify the records of the old customer data so they will be associated under the new customer name. Follow the steps in this tutorial and you should have no problems.
Note: Make sure no other users are
logged into PrintPoint.
- Select Navigator > Customer.
- Double
click the customer whose name you want to change.
PrintPoint displays the Customer Detail Screen. - Modify the record as needed
- Click OK.
- Select Navigator > Estimate.
- Click the Select button and choose Show All Records from the drop-down menu.
- Sort the list by Customer Code by clicking on the column heading Customer Code.
- Scroll down the list until you get to the customer code name that needs to be changed.
This is the name of the customer code before you changed it in steps one and two.
- Highlight all the estimates with the old customer code name.
- If on
a Mac press CMD+SHT+C.
If on a PC press CTRL+SHT+C.
PrintPoint displays the Change Customer Code Choice List.
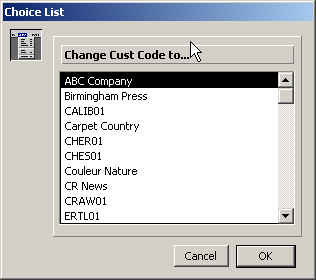
- Select the new customer code from the list and click OK.
- Repeat steps 4 thru 10 on the Job and Invoice List.